
On this page
LinkedIn Sales Navigator is powerful — when it works for you.
But if it no longer fits your workflow or budget, canceling shouldn’t feel like mission impossible.
This guide walks you through everything you need to cancel Sales Navigator quickly and confidently — without losing valuable data or time.
✅ Fast steps to cancel your subscription
✅ Smarter alternatives to consider
✅ What happens after cancellation (and what to prep before)
Steps to cancel LinkedIn subscription
Let’s make this quick. Canceling Sales Navigator might look complicated — but it only takes a few clicks:
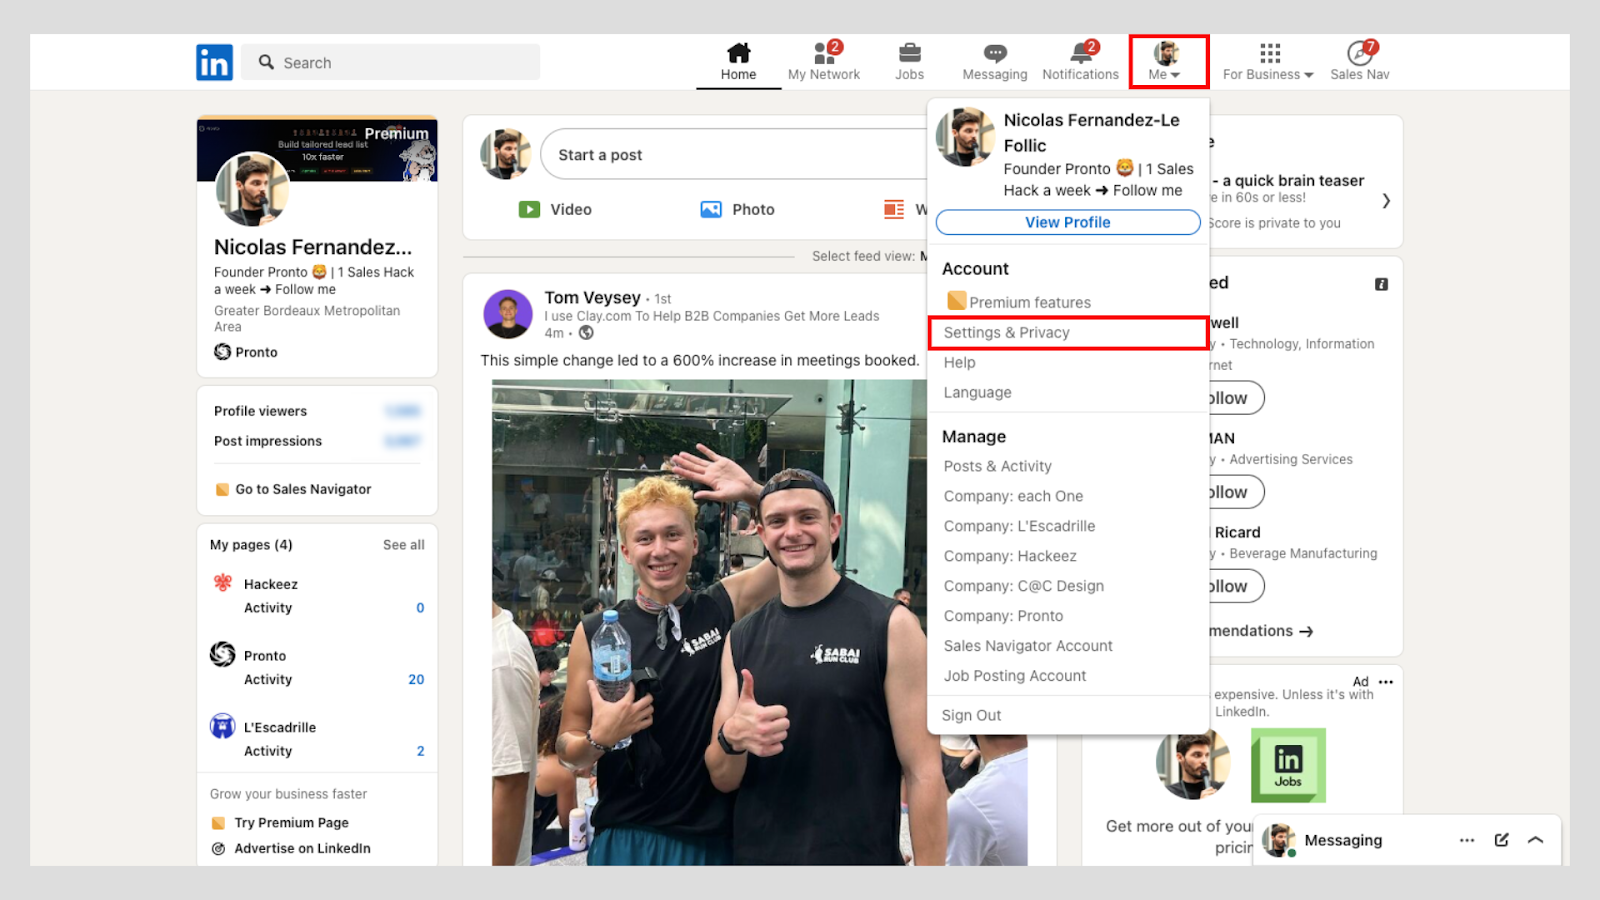
1️⃣ Sign in to your LinkedIn account.
2️⃣ Click on your profile picture on the Me icon at the top right corner.
3️⃣ Select 'Settings & Privacy' from the dropdown menu.
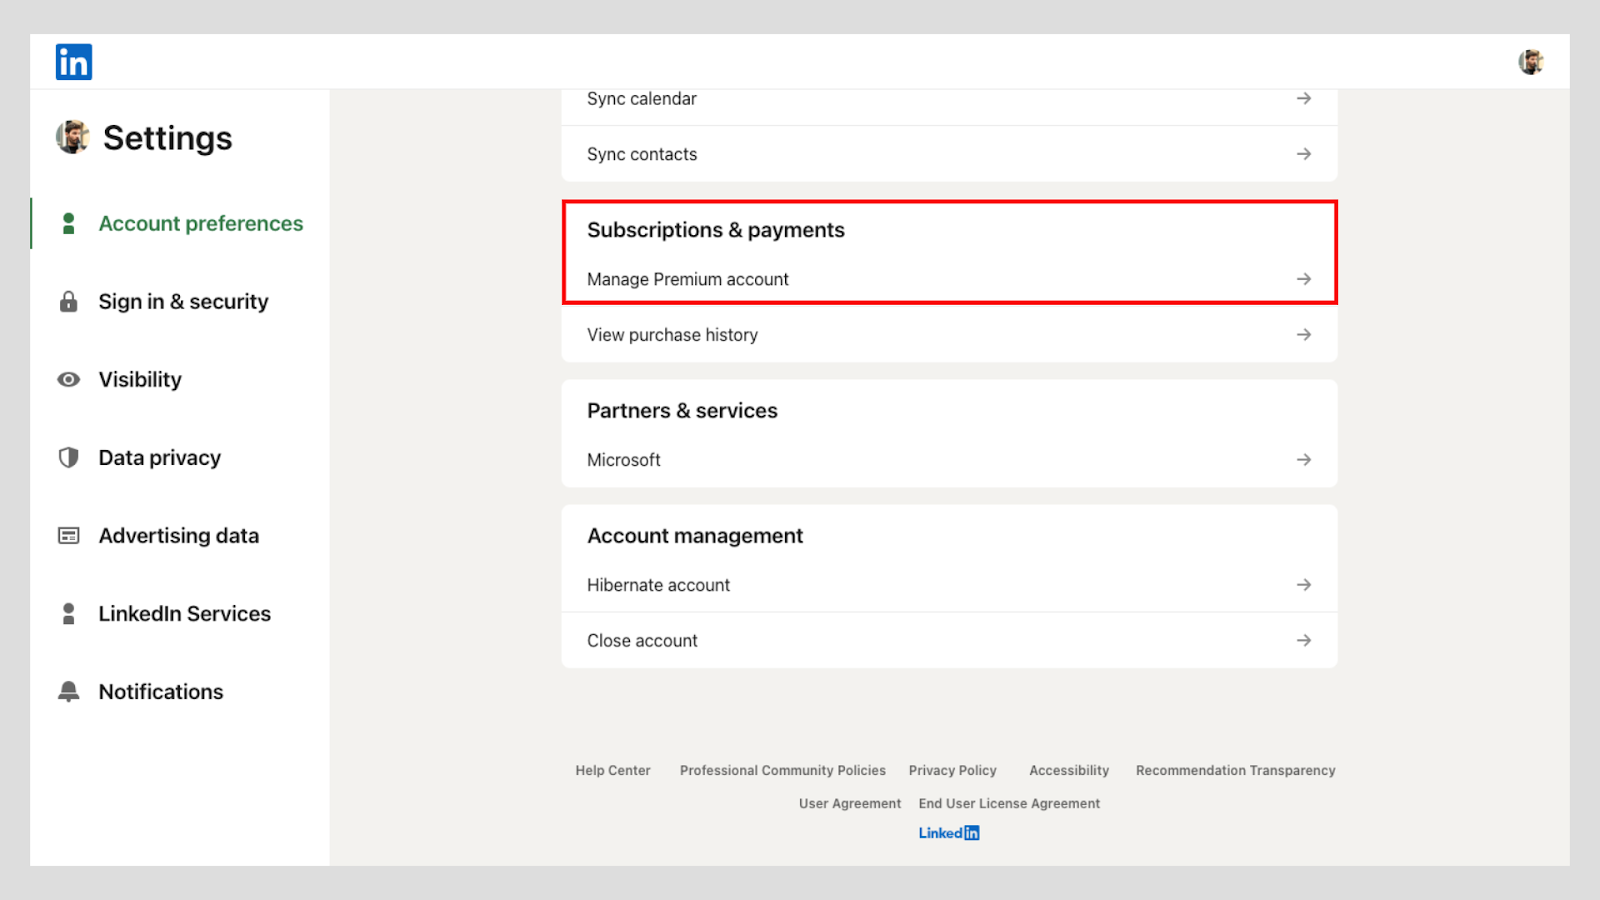
4️⃣ Under 'Account Preferences' go to 'Subscriptions & Payments'.
5️⃣ Click on 'Manage Premium account' and choose between 'Manage subscription' and 'Cancel subscription'
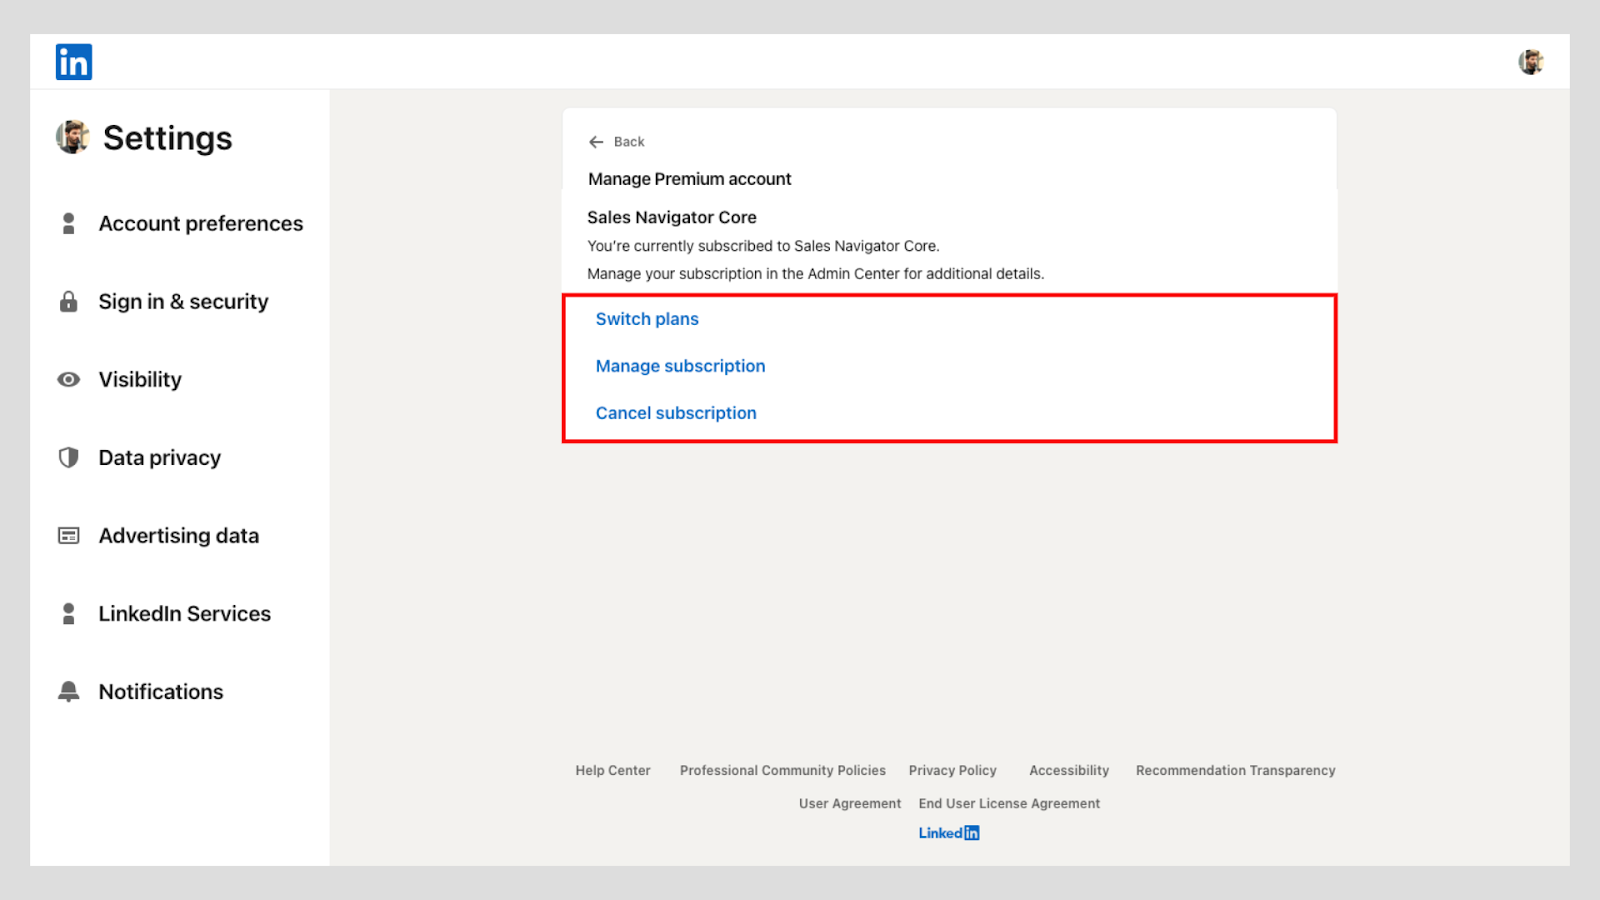
6️⃣ Follow the prompts to complete the cancellation process.
Pro Tip: Canceling your subscription cuts off access right away — so make sure to save any leads, notes, or reports you want to keep before you hit that cancel button.
Alternatives before cancelling Sales Navigator
Canceling isn’t your only option. If Sales Navigator feels "too much", try this:
⬇️ Try a downgrade: Instead of canceling completely, consider switching to Sales Navigator Core or even LinkedIn Premium, which still gives you InMail credits.
🤑 Look out for retention deals: When you go to cancel, LinkedIn might hit you with a Sales Navigator discount offer to keep you around. If the price was your issue, it’s worth pausing here.
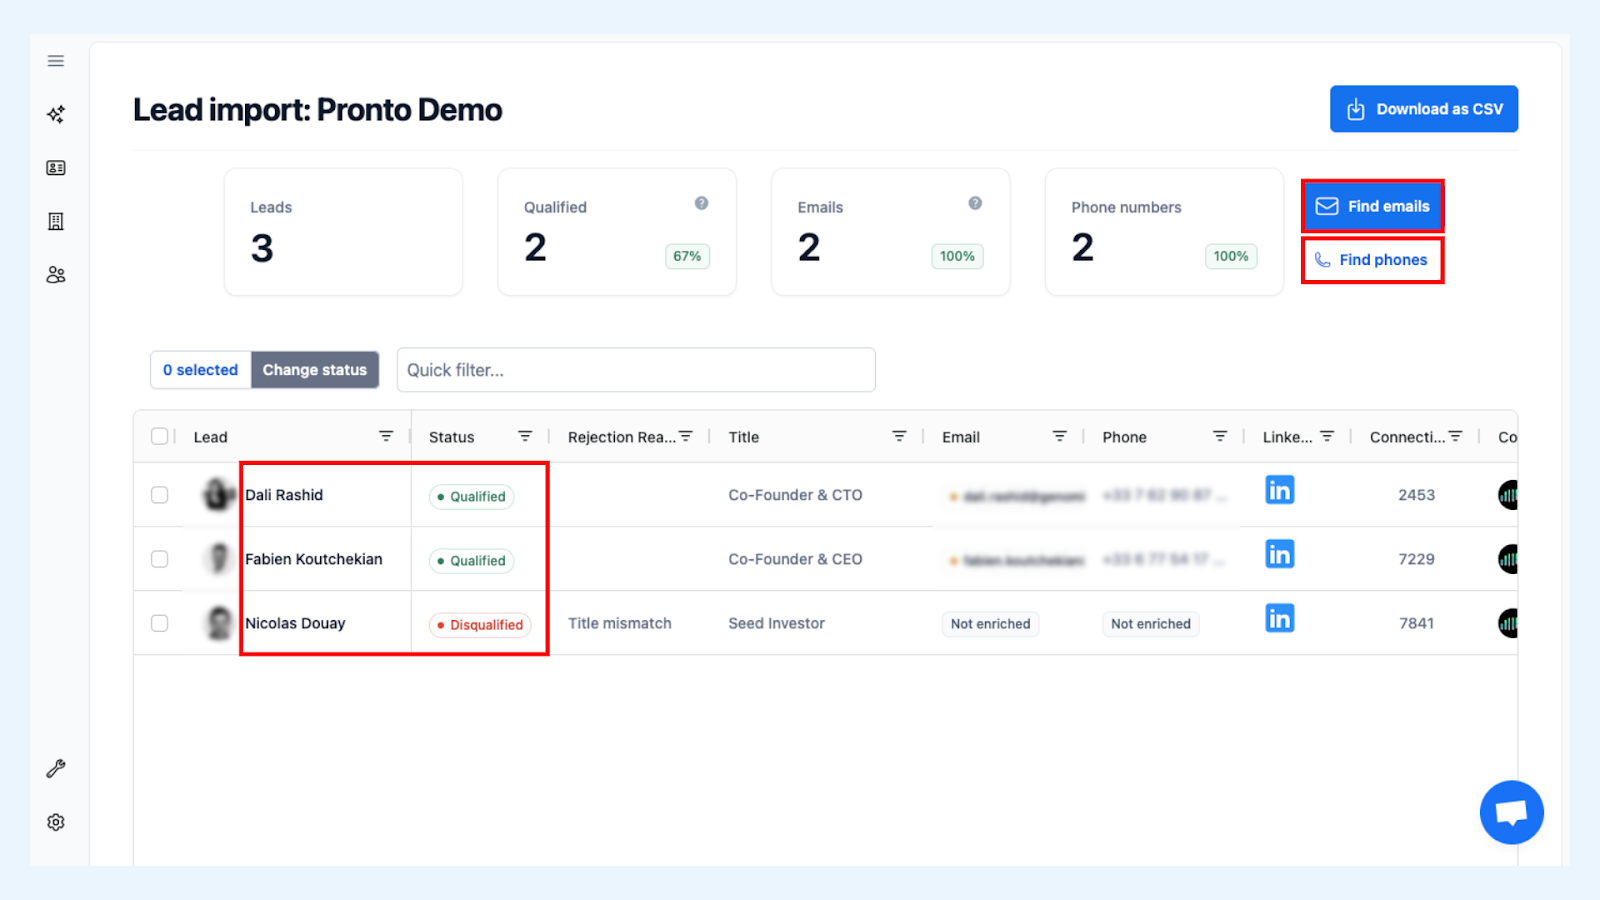
🛠 Need better tools instead? If you're downgrading, you’ll need solid tools to fill the gap. Try a Sales Navigator scraper like Pronto to keep lead extraction fast and efficient.
FAQ
Can I cancel my LinkedIn Premium subscription?
Yes — and that includes Sales Navigator. The process is exactly the same for LinkedIn Premium subscription.
Go to Settings > Account Preferences > Subscriptions & Payments.
What happens after canceling Sales Navigator?
Your access stays active until the end of your billing cycle. But once it ends, so does access to saved leads, InMail credits and advanced filters. After that, it’s locked unless you renew or purchase a new plan.
Pro Tip: Think about exporting your leads and notes before your subscription ends to prevent any loss of data.

Do I get a refund after cancellation?
Short answer: Probably not.
LinkedIn typically doesn’t refund canceled subscriptions.
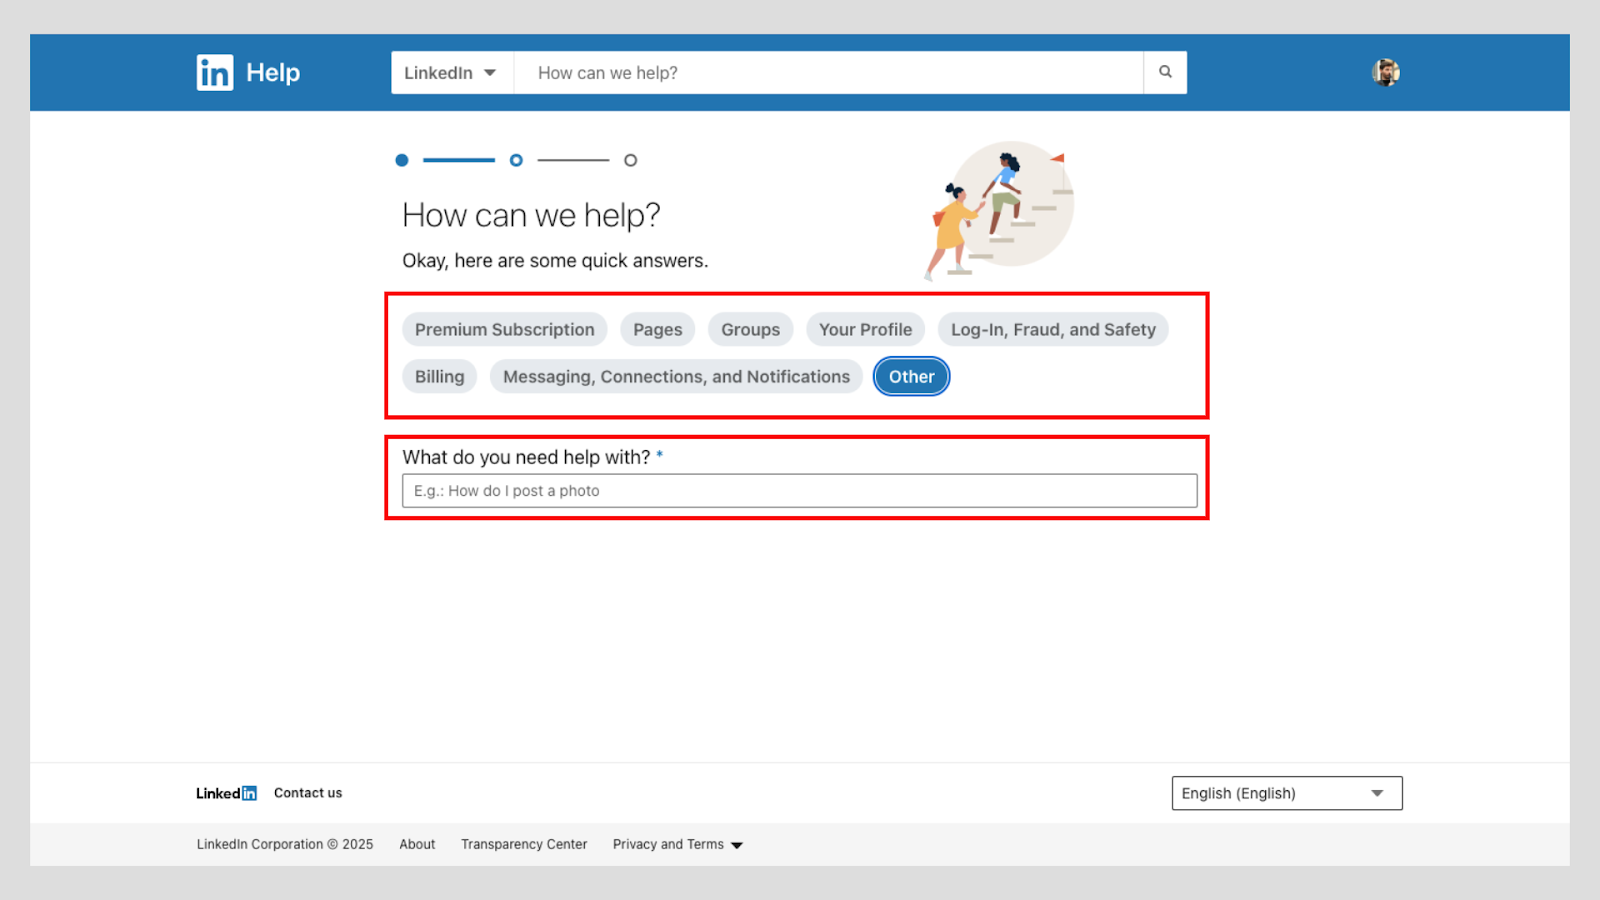
That said, if you think there was a mistake — or special case — you can fill a request through customer support by clicking on the Help Center option at the bottom of any LinkedIn page.
Want to know more? Check LinkedIn’s refund policy in their Help Center or our dedicated Sales Navigator refund guide.
Where to find cancellation options?
Simple path:
👤 Click the Me icon (top right)
⚙️ Go to 'Settings & Privacy'
📂 Navigate in the 'Account Preferences'
💳 Select 'Subscriptions & Payments'
That’s where you can cancel your subscription settings.

How to manage my LinkedIn subscription?
Want to upgrade, downgrade, or cancel?
It’s all in one place: Account Settings > Subscriptions & Payments
You’ll see all active subscriptions and can make changes in just a few clicks.
If you need a copy of your LinkedIn Sales Navigator receipt, just head to your account settings: Settings & Privacy > Subscriptions & Payments > View purchase history.
Pro Tip: If you're a LinkedIn Sales Navigator admin, you can manage advanced subscription options in the Admin Center.
+30 Sales Hacks
Generate tons of meetings in one month.